Once you have a vendor account, it is very easy to be up and running in as little as 30 minutes. This is a quick guide to get you up and running fast, and is not a exhaustive guide of all of Ordery’s features.
How it works
The first page you will see when you log into your vendor login is the vendor dashboard. This dashboard contains various stats for you.
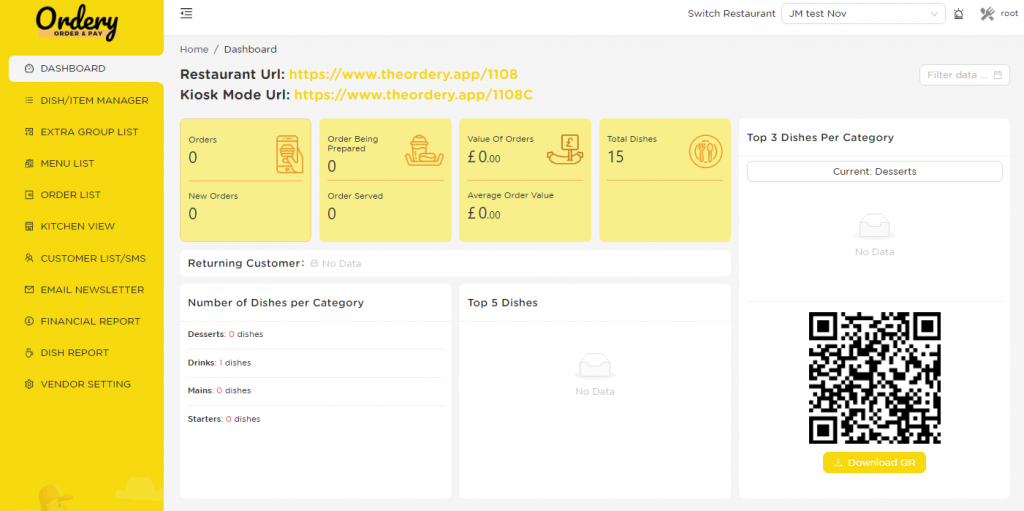
Here you can see your restaurant URL – in this example you can give your customers the URL theordery.app/1108 or www.theordery.app/1108 or they can scan the QR code by using their smart phones camera and it will take them to your page to order.
Order List
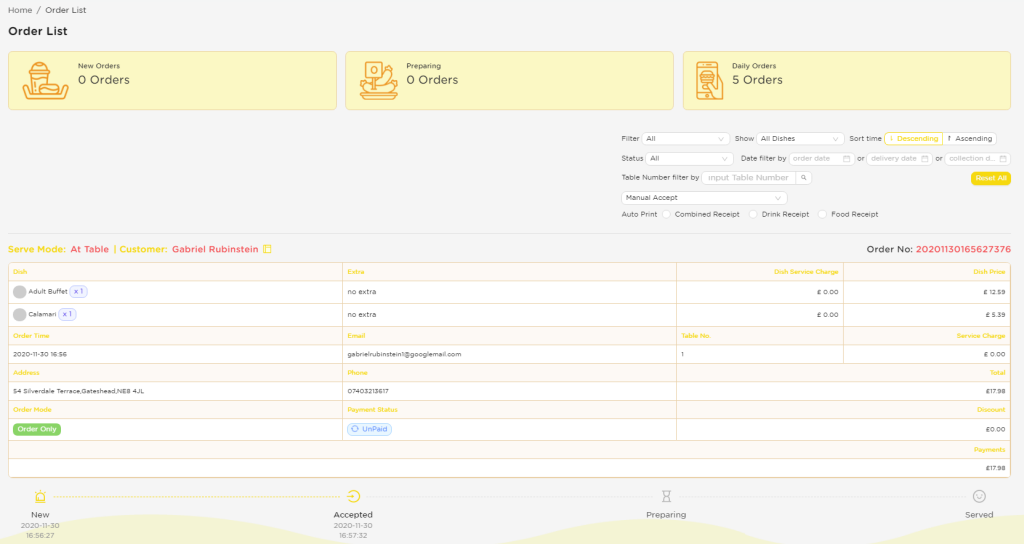
Your order list, which can be navigated to from the left menu, is where you can see your orders. Whenever you get an order, it will update here. In fact, no matter what page you are on you will receive a visible popup alert and audible alert when you receive a new order. Vendors leave this page on most of the time, as you can instantly see new orders appear.
Build Your Menu
Here we will go through how to build a menu. Its fast and easy.
Add Dishes/Items
Firstly, we need to add dishes/items by using the dish / item manager, then we can add them to our menu.
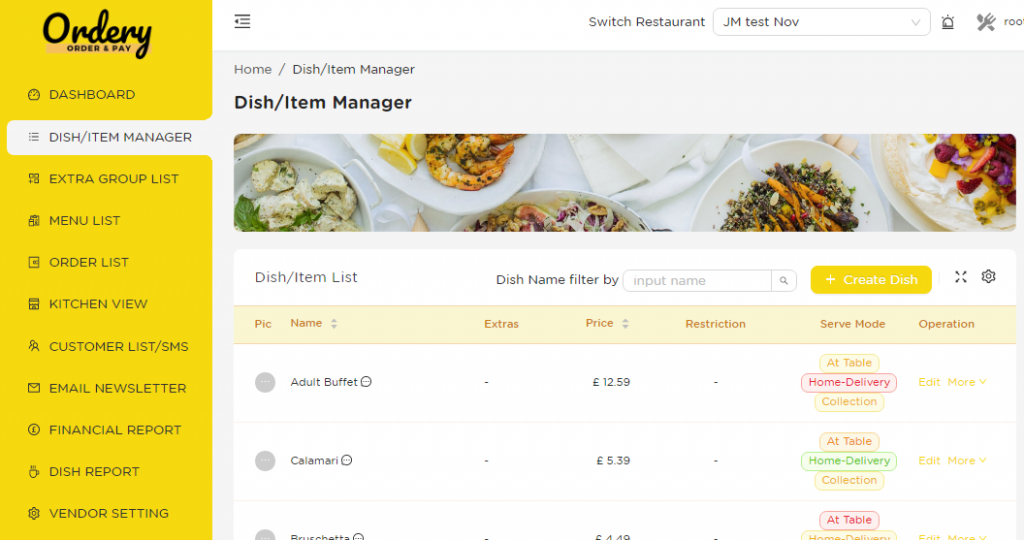
You can navigate to the Dish/Item manager by clicking on it in the left hand menu.
Here you can see all your dishes and items.
If you want to add a dish, click Create Dish in the top right of the screen.
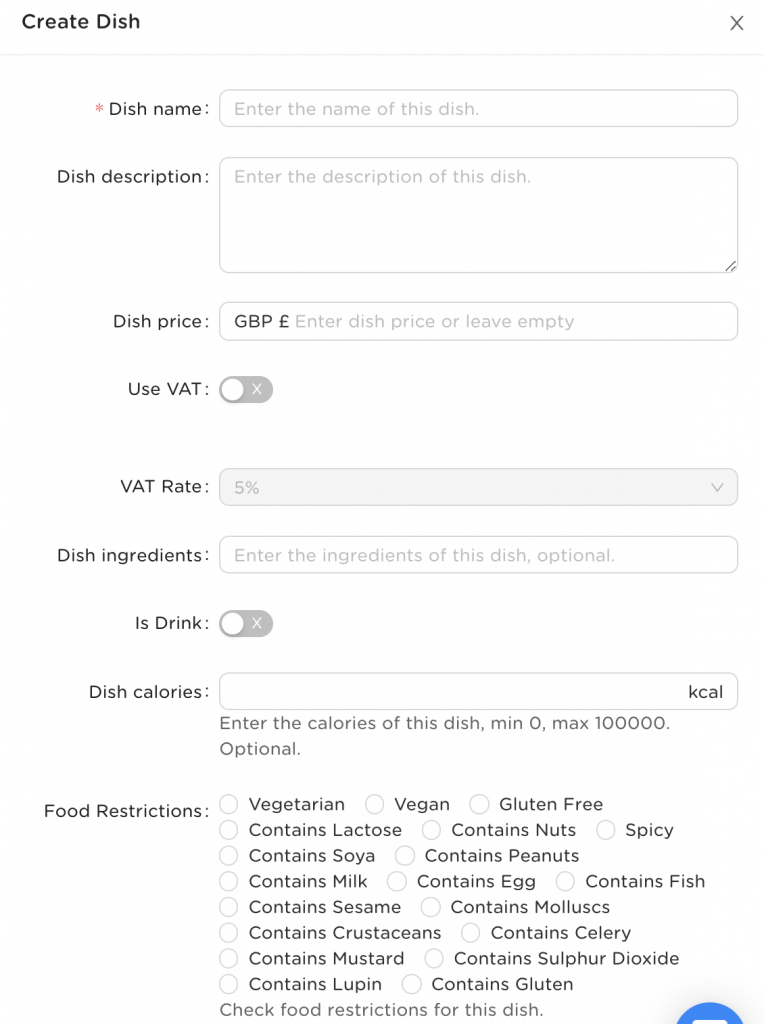
Fill in all of the fields. If it is a drink item, click the toggle for “Is Drink”, and click any food restrictions so they appear on your menu.
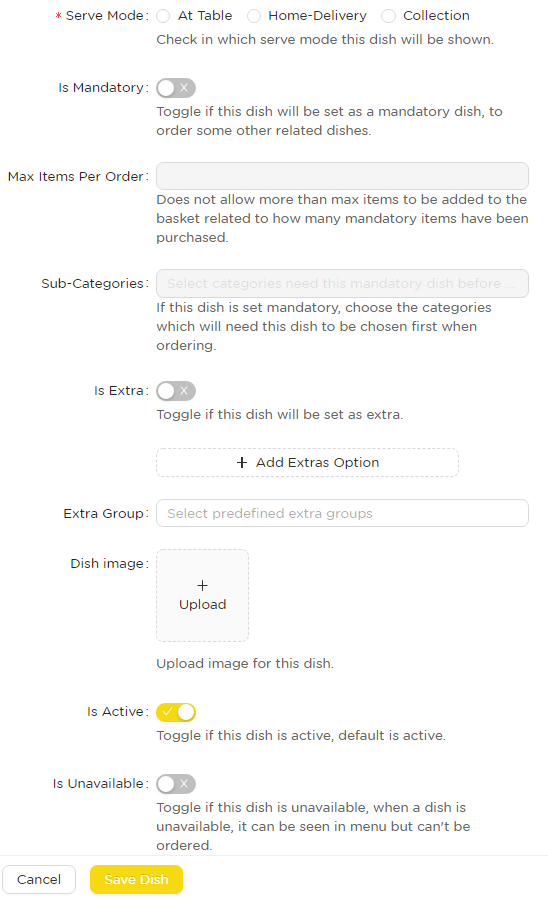
Here you can add what serve modes your dish / item is available for, at table, home delivery, collection or room service.
If it is an extra, for example, it is a side salad which you want to make a extra for other dishes, click the toggle “is extra.”
If you want to add extras to this dish, click the add extras option.
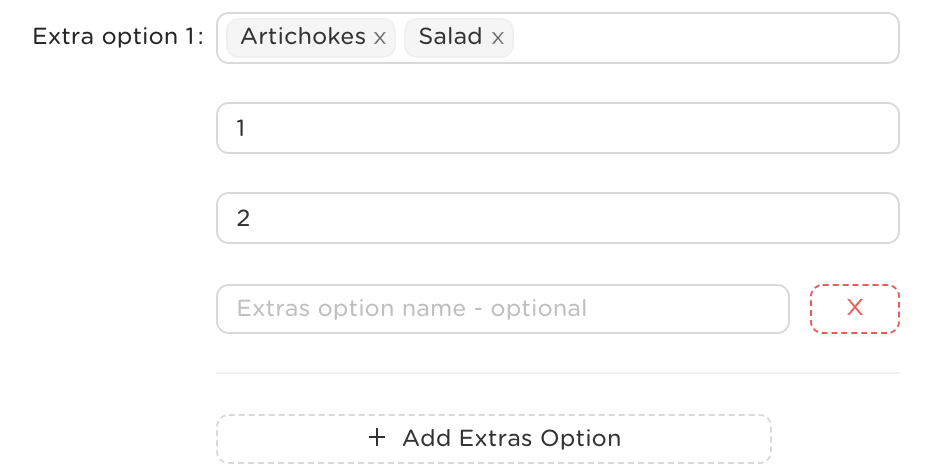
Here for example, we have added an extras option of Artichokes or Salad, in the minimum amount of selections box we have selected 1, and max 2, so the customer can select a minimum of 1 extra and a max of 2 extras in this section. You can also set a name for this extras option. You can add as many extras options as you want, by clicking Add extras option, then the customer will have a second, or third question for extras.
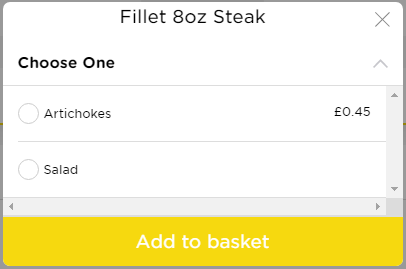
So now if a customer selects this option, they will see the extras prompt
Once you have saved your dishes / items, you can move on to adding them to a menu.
Creating a Menu
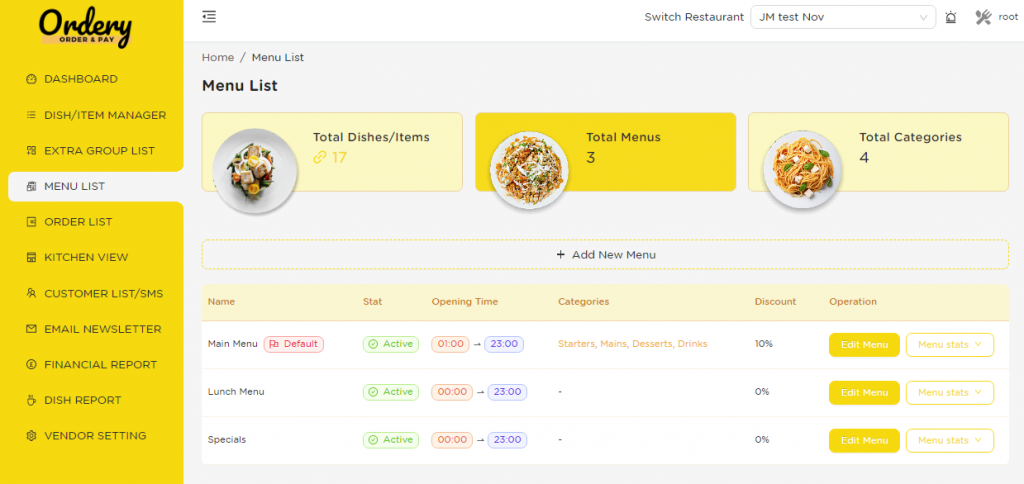
Here you can Add New Menus. You can have multiple menus available at the same time or different times which will appear to the customer and the customer can swap between. They can order some items off one menu and some off another. This is useful for example to do a lunch menu which appears during lunch times, or a happy hour during other items.
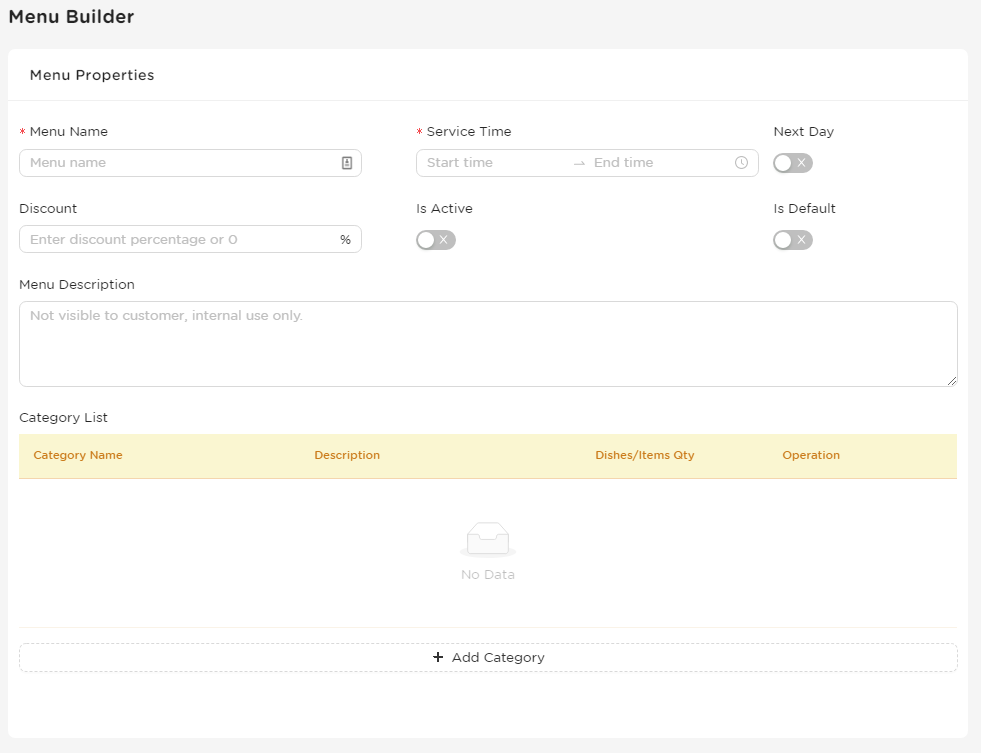
When adding a menu, add your menu name, and service times. If it differs per day when you are open don’t worry about that, we will set opening times later and this can be specified per day. If you are open past midnight click the Next Day toggle. E.g. If you are open 9am to 2am the next day, put that.
Add your categories e.g. Starter, Main, Dessert, on each category ensure you click save.

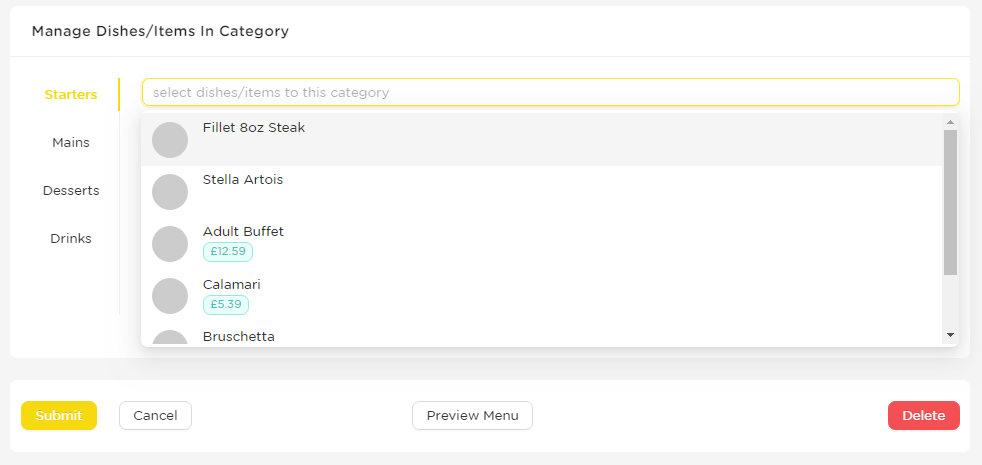
Once you have your categories saved, they will appear below, here you can add the dishes to each category. You can drag them up and down on what order they should appear.
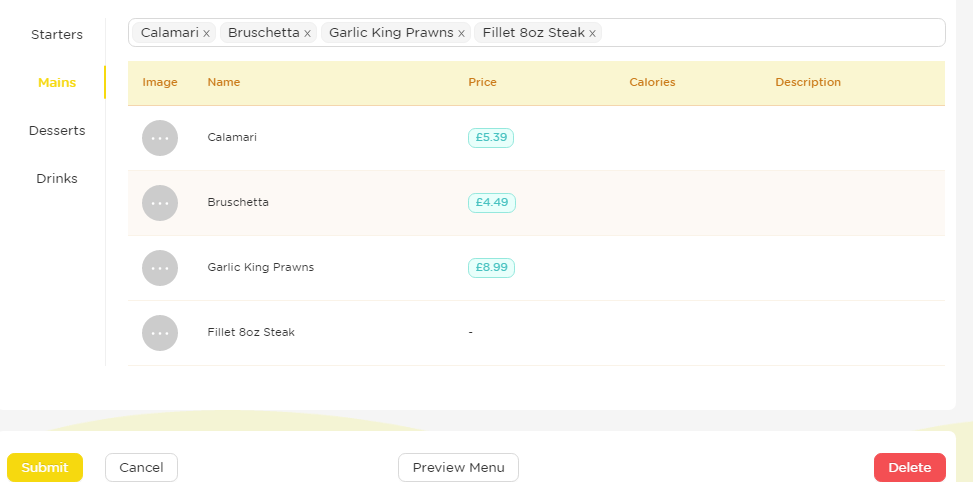
Once you’ve added your categories and added your dishes to your categories, your menu is good to go!